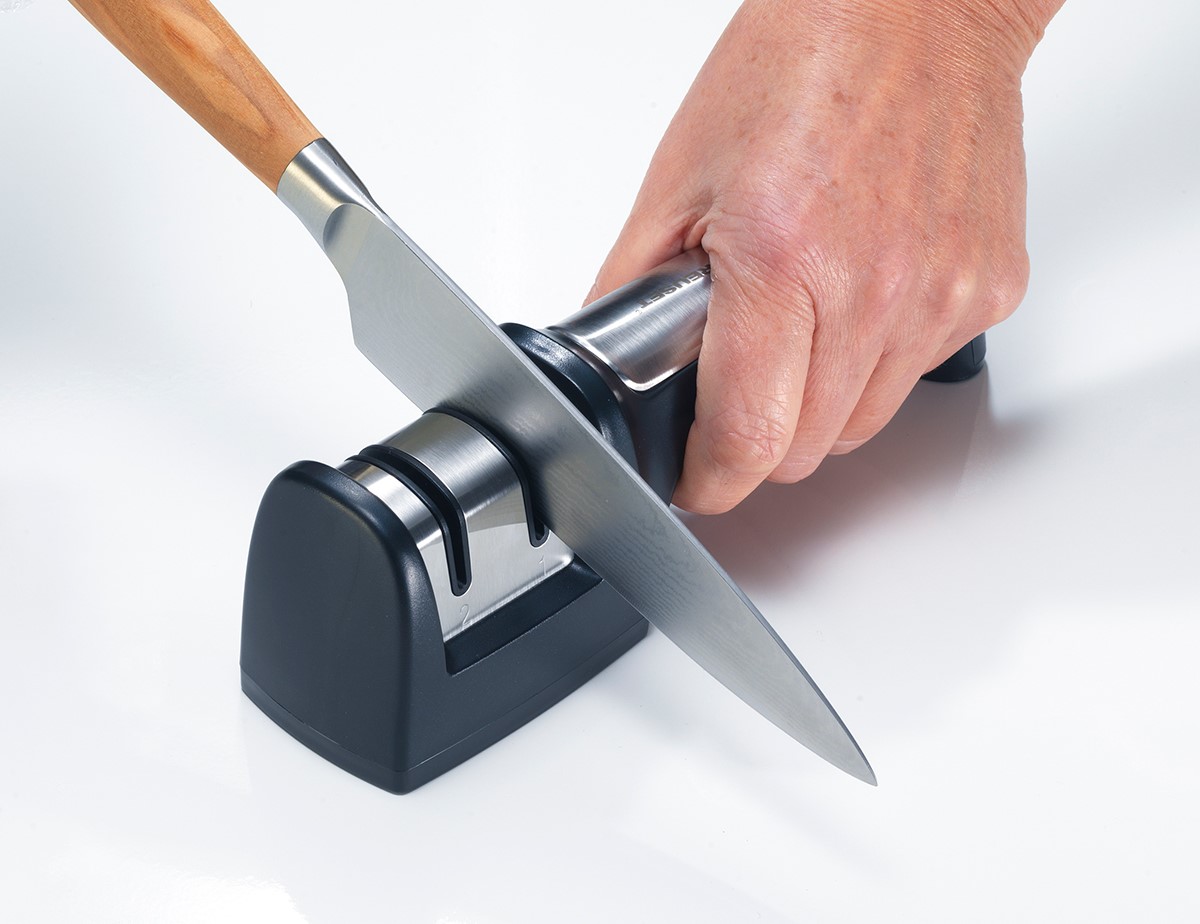
A dull knife is less useful and often less predictable than a sharp one. It asks you to push harder, slips more easily through food, and turns a simple prep task into a frustrating one. The right answer is not always an aggressive pull-through sharpener. Most kitchen knives need a light touch-up long before they need a new edge. For the person who wants repeatable results without learning freehand whetstone technique, the Work Sharp Precision Adjust is the best place to start. It clamps the knife, guides the abrasive, and lets you select an angle from 15° to 30°.
Choose the Work Sharp Precision Adjust Elite when you own several knives, want more abrasives and a strop, or need a more complete system for repairs and refinement. A basic ceramic honing rod is still worth keeping for routine maintenance, especially for a knife that cuts well but has begun to feel slightly less eager. The key is to choose the least aggressive tool that solves the problem. A sharpener removes steel; a rod can realign or lightly refine an edge. They are not interchangeable.
Quick picks
| Pick | Best for | Main trade-off |
|---|---|---|
| Work Sharp Precision Adjust | Beginners who want a repeatable manual sharpening angle | It takes more time than a quick pull-through device |
| Work Sharp Precision Adjust Elite | People who maintain several kitchen, pocket, or outdoor knives | Higher cost and more pieces than most kitchens need |
| Ceramic honing rod | Frequent light maintenance between true sharpening sessions | It cannot repair chips or create a new bevel |
The standard Work Sharp Precision Adjust is the guided-system pick
The Work Sharp Precision Adjust is the right tool for someone who wants an edge they can repeat. Work Sharp specifies an angle-adjustable chassis from 15° to 30°, a V-Block clamp, a benchtop base, and a rotating Tri-Brasive handle with 320- and 600-grit diamond plates plus a fine ceramic stone. The sharpener weighs about 1.8 pounds and carries a three-year warranty.
Those details address the hardest part of sharpening: holding the same angle on both sides of a knife. The clamp stabilizes the blade. The angle dial lets you choose a target. The guided abrasive moves along that target instead of asking you to judge a freehand angle by feel. It does not make sharpening automatic. You still need to use a light hand, create an even burr, and work through the abrasives with patience. It simply removes one variable that causes many home-sharpening mistakes.
For common double-bevel kitchen knives, Work Sharp’s own guidance puts many factory edges in the 15° to 20° range per side, with wider angles generally more durable and narrower angles more optimized for fine slicing. Do not change an existing knife to a radically different angle just because the dial allows it. A full angle change removes more material and takes longer. If you like the way a knife cuts, use the factory specification when available, or make a conservative choice and maintain it consistently.
Start with the fine diamond or ceramic only if the edge is merely tired. Use the coarse diamond for a knife with visible chips, a rounded edge, or a bevel you are intentionally resetting. Coarse abrasives solve real damage quickly, but they also remove steel quickly. The goal is a clean apex, not a dramatic makeover every time you cook. When one side develops a small burr along the whole edge, switch sides and repeat. Then refine with the finer surfaces.
The standard Precision Adjust is less convenient than a countertop pull-through sharpener, and that is the point. It encourages a slower, more controlled process. It is a poor fit if you demand a three-second fix before dinner. It is a good fit if you are willing to spend several minutes giving a chef’s knife a consistent edge a few times a year. Check the current Precision Adjust listing on Amazon.
Choose the Elite version for a broader sharpening system
The Work Sharp Precision Adjust Elite is the upgrade for a person who has outgrown a three-surface sharpener. It also adjusts from 15° to 30° in one-degree increments, but adds a second Tri-Brasive handle, five diamond grit plates, a fine ceramic surface, a leather strop, storage rack, and carry case. Work Sharp lists it at 3.8 pounds with the same three-year warranty.
The added abrasives have a clear job. Coarser grits help repair chips and reset a damaged edge. Medium and fine diamonds establish and refine the bevel. Ceramic and a strop finish the edge after the abrasive work is done. That progression is useful when you own several kinds of knives or want a more polished result. It is unnecessary if you have two ordinary kitchen knives that only need an occasional refresh.
Buy the Elite because you will use the extra progression, not because more grits sound more professional. More choices can make a beginner less consistent. The standard system covers the basic sequence well. The Elite makes sense for someone maintaining pocketknives, outdoor blades, kitchen knives, and perhaps serrations with one organized system. It also makes sense when storage and repeatability matter enough to justify the bigger kit.
Do not mistake a polished edge for a better edge in every task. A very refined edge can be pleasant for clean slicing, but a kitchen knife used on boards, squash, and everyday produce still needs durability. Stop when the knife cuts cleanly and safely. The point of sharpening is food preparation, not a mirror finish.
Keep a ceramic rod for light maintenance
A ceramic honing rod is the simplest companion to a guided sharpener. It is more abrasive than a smooth steel rod, so it can lightly refine an edge as well as help maintain it. Use it on a knife that still cuts but feels less crisp through tomato skin, herbs, or onion. It will not remove a chip, fix a broken tip, or rescue an edge that has become visibly rounded.
Use the rod with care. Place its tip on a stable surface with the rod vertical if that feels safer than holding it in the air. Move the knife down and across at an angle that approximates the existing bevel, using very light pressure. Alternate sides. The goal is controlled contact, not a fast television-chef flourish. If you cannot keep the angle stable, use the guided system instead.
A smooth steel is often called a honing rod, but its main role is alignment rather than abrasion. A ceramic rod has more cutting effect. Both can be useful, but neither replaces sharpening forever. When the knife continues to slide on food after a few careful passes, stop repeating the rod and give it a proper sharpening session. Overworking a rod on a dull knife wastes time and can create a less tidy edge.
Know the difference between honing and sharpening
Honing is maintenance. It can straighten or lightly refine the very thin edge that has bent or worn in normal use. Sharpening creates a new apex by removing metal. A knife that feels slightly off after a few meals may respond to honing. A knife that will not bite into paper or tomato skin, has visible chips, or has been used on hard materials needs sharpening.
The distinction matters because the wrong tool can be too aggressive. Pull-through sharpeners often use hard abrasive slots at a fixed angle. Some work adequately for a worn inexpensive knife, but they remove material quickly and may not match the knife’s original geometry. They are not a good default for a thin Japanese-style blade, a serrated knife, or a knife you value. A guided system lets you choose an angle and make gradual changes.
Whetstones are the traditional freehand option. They offer flexibility and can make excellent edges, but they require practice in maintaining an angle and managing the stone. A 1,000-grit stone is a common practical starting point for general sharpening, followed by a finer stone or strop if needed. Choose stones when you want the skill and control. Choose a guided system when you want repeatability with a shorter learning curve. Neither method is morally superior.
Choose an angle for the knife, not the marketing
The listed sharpening angle is generally per side for a double-bevel knife. A lower angle slices with less resistance, but there is less steel behind the edge and it can be more prone to chipping. A wider angle offers more support and can tolerate harder use. Work Sharp describes many kitchen knives in the 15° to 20° per-side area, while outdoor and pocket knives are commonly wider.
Check the maker’s information when possible. If that information is not available, do not make a big change on the first session. Color the existing bevel lightly with a marker, set the guided abrasive against it, and look for the setting where contact reaches the whole bevel. This helps you understand the current geometry. Use light passes and recheck rather than grinding until the number on the dial feels authoritative.
Single-bevel knives and serrated knives need special treatment. Do not put a standard double-bevel routine on a single-bevel Japanese knife without understanding its factory geometry. Serrations are usually maintained from the beveled side with an appropriately shaped ceramic rod or professional service. If a knife is expensive, chipped badly, or has an unusual blade shape, professional sharpening can be the most economical choice.
A safe sharpening routine
Work on a stable, uncluttered bench with good light. Clean and dry the knife first. Keep fingers away from the edge and clamp the spine securely. Move the abrasive deliberately, not quickly. Wipe away metal debris carefully with a cloth after the knife is unclamped; do not sweep filings with bare fingers.
Begin with the least aggressive abrasive that could solve the problem. Make passes until a consistent burr forms from heel to tip on one side. Flip the knife and repeat until the burr returns. Then move to a finer abrasive to remove and refine the burr. Test sharpness by slicing a piece of paper or a soft tomato with controlled pressure. Do not test by drawing the blade across a thumb.
Once the edge is sharp, wash and dry the knife before preparing food. A sharp knife should be stored so its edge does not strike other metal tools: a magnetic strip, blade guard, knife block, or drawer insert all work when used thoughtfully. Do not put quality knives loose in a crowded drawer. Edge maintenance starts with storage.
Care for the knife between sessions
Use a cutting board that is kind to the edge. Wood and quality plastic boards are usually better choices than glass, stone, ceramic, or metal surfaces. Do not use a chef’s knife to twist through frozen food, pry a lid, or cut on a plate. Those habits dull or chip an edge faster than normal cooking.
Hand-wash kitchen knives and dry them soon after use. Dishwashers expose knives to heat, moisture, detergent, and contact with other objects. Even stainless steel can stain or corrode under the wrong conditions, and a sharp edge can strike rack components. Let a knife cool after any hot-water wash before sharpening; handle temperature and clean contact surfaces matter.
Sharpen on need, not on a schedule. A knife used daily on a board will need attention more often than one used occasionally. The practical trigger is performance: when the knife no longer moves through food cleanly after a light maintenance pass, schedule a true sharpening. Avoid a habit of aggressive sharpening “just in case.” Steel is finite.
Buy for the knives you own, not the sharpener’s promise
Look at the collection before buying a sharpening system. A household with two stainless chef’s knives and a paring knife needs a simple guided sharpener and perhaps a ceramic rod. A cook with thin Japanese knives, serrated bread knives, cleavers, outdoor blades, and pocketknives may need a broader system or professional help for unusual pieces. One tool does not have to service everything perfectly.
Keep a note of each knife’s maker, steel if known, and factory edge guidance. This turns future sharpening into maintenance instead of guesswork. For a valued knife, photograph the blade and bevel before changing anything. If the edge has a deep chip, a broken tip, visible corrosion, or an asymmetric bevel you do not understand, stop and get an experienced sharpener’s advice. Paying for a professional repair is often cheaper than removing too much material at home.
A sharp knife also makes the rest of a cooking routine more pleasant. Pair the right edge with a stable board and the few kitchen tools that actually earn counter space. If your prep is mostly vegetables, a sharp chef’s knife and a simple board solve more problems than a drawer full of specialty blades. The sharpening system should support those basics, not turn them into an endless hobby. For a complementary prep task, our tweezers guide covers fine, non-knife work around the kitchen and home.
For outdoor, tactical, or work blades, separate the decision from kitchen sharpening. These knives may need a wider, more durable angle and have different legal, safety, and field-use concerns. A compact field sharpener can be useful in that context, but it is not automatically the best tool for the thin edge of a kitchen knife. Keep each sharpening setup deliberately task-specific and simple.
How we researched
We compared current manufacturer information on Work Sharp’s angle ranges, clamps, abrasives, warranty, weight, and guidance about common knife angles. We separated maintenance tools from sharpening tools and did not claim hands-on testing. Knife geometry, steel, and condition vary, so this guide favors conservative, repeatable methods and recommends professional help for unusual or damaged blades.
Knife-sharpener questions, answered
How often should I sharpen a kitchen knife?
Sharpen when performance calls for it, not by a calendar. Regular home use may need a light maintenance pass often and a true sharpening a few times per year, depending on the knife and cutting surface.
Can a honing rod sharpen a dull knife?
Not usually. A rod can maintain or lightly refine an edge. A dull, chipped, or rounded edge needs an abrasive sharpener or professional service.
Are pull-through sharpeners bad?
They are fast but often remove a lot of material at a fixed angle. They can be acceptable for a basic knife, but a guided system provides more control for knives you want to preserve.
What should I do with a serrated knife?
Use a tool designed for serrations on the beveled side, or have it serviced. Do not run a serrated knife through a standard flat sharpener.
Affiliate note: SuperGrail may earn a commission when you buy through an Amazon link. That does not affect how we explain the trade-offs.